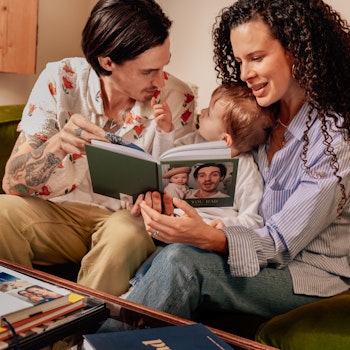
In a time when photo memories live mostly on our screens, the tactile experience of opening up a personalised photo book feels more special than ever. But before you spend an entire afternoon sifting through the photos on your camera roll or Facebook, read our tips on making a really beautiful photo book. No one likes pixelated shots, crammed pages, or an album with no tale to tell, after all. Behold: our guide to getting it right.

1. CHOOSE A THEME
It’s all about the theme. The best photo books tell a story with a beginning, middle and (a preferably happy, hilarious or heartfelt) ending, and this is easier to do when you focus on one theme or event. Celebrate life milestones with a wedding or new baby book, or create a tribute to a little one’s first birthday or an unforgettable holiday with friends. Hen party book, travel book, work leaving present – the options are endless.

2. PICK A COVER DESIGN
Now for the most fun part – choosing your cover. From pastel shades to palm prints, portrait to landscape, we’ve got all the options. Find your favourite and try to match it to your theme – it’ll set your tone nicely from the off. Our Minimalist design is perfect for modern fairy tales – like your best friend’s wedding, whilst our fun, patterned covers are just the thing for kids’ birthday presents.
3. SELECT & ADD PHOTOS
When you come to add your photos, there a few faux pas that are easy to make. Follow these handy hints to guarantee picture-perfect results…

Use high-quality photos
Use high-resolution photos to avoid pixelated shots. (Our clever online editor will warn you if images are too low-res.) And remember not to use particularly dark photos, as they won’t print well. You can use your phone’s editing software or apps like VSCO to lighten them. Check out our interview with lifestyle photographer and blogger Claire Menary for tips on taking/editing photos.
Think about your story
Your book should feel like a journey, so consider the order of your photos and save your winning shot till last. Chronological order will help your narrative, but you don’t have to stick to this – sometimes it’s more aesthetically pleasing to arrange photo in terms of style. And, luckily, it’s easy to drag and drop pages using our editor, so you can play about with page order until you’re 100% happy.
Get friends & family involved
Whether you’re creating books for your wedding party or a funny album for your friend’s 30th, don’t be shy to ask your nearest and dearest if they have any shots you can use. (You can even credit them in the captions.) The more photos you have to choose from, the better your book will be. Plus, it’s a nicer surprise for your lucky receiver when they spy shots they didn’t even know existed inside their book.
4. CUSTOMISE YOUR LAYOUTS
We’ve got lots of layouts for you to choose from, so take a look to see what’s going to work best for your spread…
Less is more
Your lovely images deserve to be showcased to their full potential, so be sure not to cram them together. Collate a few photographs that complement one another onto each page (try combining photos with similar colour schemes or ones that work together to set a scene) and let your standout shots take centre stage on a page of their own.
Consider the bigger picture
Mix and match layouts to keep things interesting and give certain events a different feel by picking a layout that fits the vibe. For instance, a birthday book might start with single, centred square shot of the person as a baby, then you could scatter several shots of them growing up with the people who matter to them – family, school friends and so on. It helps to put lower res photos in small photobox layouts, and only use very high-res shots for your full-page layouts.

Find that balance
Strike a balance when positioning your photographs. For example, don’t use all your landscape shots in one section and close-ups in the next. Find a rhythm. Using different layout types as you go will help with this. And if you have two photos that are similar (like one of you and one of Mum at the Statue of Liberty), then place them on opposite pages.
White space is good
Consider leaving blank pages here and there. They’re good for handwriting messages or sticking down souvenirs like train tickets, instant photos and cool business cards. You also have the option to leave white space around your photos, so you can scribble anecdotes, restaurant/street names, or the title of the song playing at the time the photo was taken.
Add captions
But don’t go overboard. Remember, a picture tells a thousand words.
Ready to tell your story? Create your own personalised photo album or a keep-forever gift for someone special here.


